Concrete Repair – The Key to a Durable Structure

The resulting structure must be durable regardless of the method used to repair concrete damage. This includes physical properties such as cracking resistance (drying shrinkage and modulus of elasticity), permeability, and freeze-thaw durability.

Concrete Repair

The key to a durable repair is bond strength. This is accomplished by a thorough surface preparation and a long, moist curing period. For professional help, contact Concrete Repair Eau Claire.

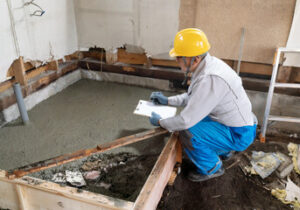
The key to a successful concrete repair is preparation. This means determining the type of damage and selecting an appropriate repair product. It also includes cleaning the surface, if necessary. This helps the new material adhere to existing concrete. In addition, etching the concrete can improve adhesion and reduce the tendency for concrete to curl or shrink once it cures.

Blowholes, voids and surface defects must be filled to ensure good bond with the new repair materials. For this purpose a wide range of concrete repair products is available. The choice should be made on the basis of the type of damage and the concrete substrate. For example, a flexi-patch or polymer-modified repair mix is well suited for small honeycomb areas that are difficult to chip out.

For the correct application of overlays and coatings, the concrete must have a consistent surface profile (CSP). To achieve this it is important to mechanically prepare the surfaces to remove cement laitance and existing coatings and to smooth out the existing concrete using shotblasting or grinding. It is particularly important to eliminate divots or pits in the concrete, because these weak points can lead to future problems.

Once the concrete has been cleaned, it must be rehydrated. This is done by spraying the surface with water. This process should be repeated several times until the surface is saturated and ready for the application of the new repair materials.

Before placing the repair materials the surface must be dampened again. This is to prevent the newly placed material from pulling moisture from the concrete it sits on. It may be necessary to cover the area with a damp burlap sheet or plastic film for several hours to ensure that the surface is kept moist.

Once the concrete has been repaired it must be protected from extreme weather conditions. This is to avoid moisture loss and drying shrinkage cracking. It is also a good idea to protect the repair from foot traffic while it is curing. This will help the new repair to remain intact, and it will slow down the recurrence of damage in that location.

Repair Materials

One of the most important factors to consider is what kind of repair material to use. There are a number of different options available, including portland cement mortar and grout, concrete patching compounds, latex modifiers, and epoxy systems. The right choice will depend on the specific needs of the project. For example, if the structure is prone to cracking, it might be best to use a cement-based product that has high early mechanical strength and low shrinkage. On the other hand, if the cracks are caused by corrosion, it might be necessary to use a corrosion-resistant repair system.

Another important factor to consider is the compatibility of the repair materials with the concrete substrate to which they will be bonded. The repair material must be able to withstand the conditions that the existing concrete is exposed to, such as temperature, humidity, chemical attack, and exposure to UV radiation. The repair materials should also have a coefficient of thermal expansion similar to that of the existing concrete, so that stresses do not transfer from the interface between the repair and the substrate.

Lastly, the repair materials should be easy to work with, especially for the field workers who will be applying them. They should be easy to mix and apply, and they should be able to set up quickly so that the repairs can be completed on time.

Portland cement and its mortars are the most commonly used repair materials for concrete structures. These materials are cheap, easily available, and have good workability properties. However, they have a poor bond with concrete substrates, and the quality of the repair is often limited by the ability of the material to adhere to the substrate.

The permeability of the repair material is also an important consideration. The material should have a low permeability to prevent the ingress of harmful chemicals. It should also be able to hydrate rapidly, so that it can form a strong interfacial bond with the existing concrete.

In order to improve the bond between the repair material and the concrete substrate, a number of techniques have been developed. Karima et al. [60] investigated the bond strength and failure mode of the interface between a special concrete with 100% limestone filler and the concrete substrate using the split and flexural bond test methods. They found that the special concrete had good adhesion to the substrate.
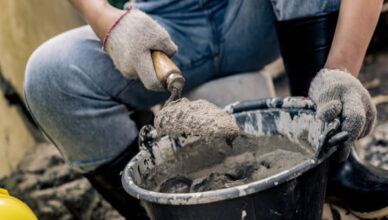
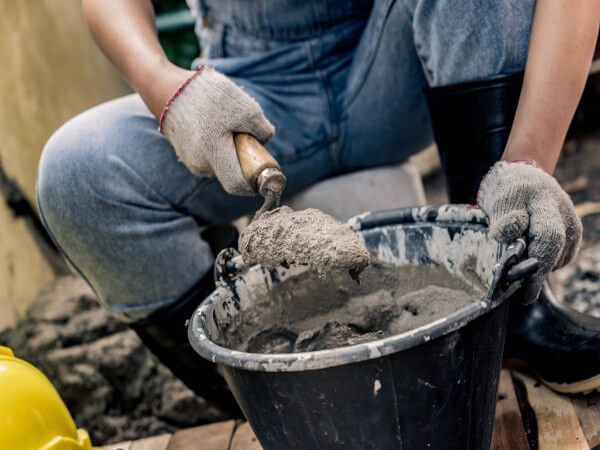
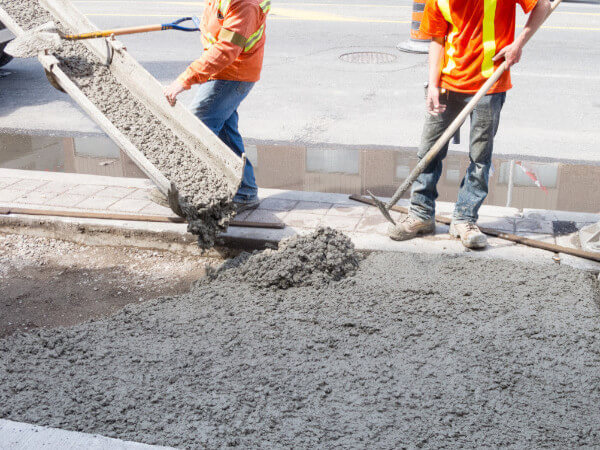
Mixing

Concrete repair is one of the most challenging jobs a contractor can face. It requires extensive research and careful selection of the right products, proper site preparation and planning, and patience to wait for the correct curing conditions. The process can be very frustrating, especially when it isn’t completed as quickly as you would like.

If you find that you have minor surface damage – cracks that do not extend down to the steel reinforcement, for example – you may be able to repair them by simply filling in the cracks with dry cement. This type of repair will provide a temporary fix for the surface but will not prevent the cracks from reoccurring.

For concrete repair to last, the cracked area must be fully consolidated and bond with the surrounding sound concrete. This will require the use of a concrete mix that is suitable for partial and full depth repairs, such as QUIKRETE EA Concrete Repair Mix with Super Plasticizer. The mix is designed to improve durability by reducing shrinkage and increasing strength. This is accomplished by incorporating fly ash and silica fume that also improve pumpability.

In addition, the concrete must be brought to saturated surface dry (SSD) condition. This will allow the new concrete to hydrate properly and reduce potential bond breakers such as air pockets or surface delamination.

Before applying any of the concrete repair materials, you should hose down the damaged area to get rid of any dirt or debris that can cause problems. This is especially important on a warm day when the concrete will rob water from the new repair mix to hydrate and harden.

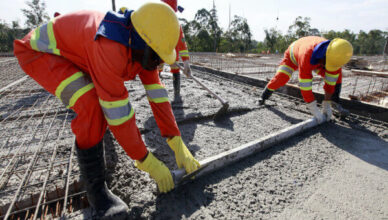
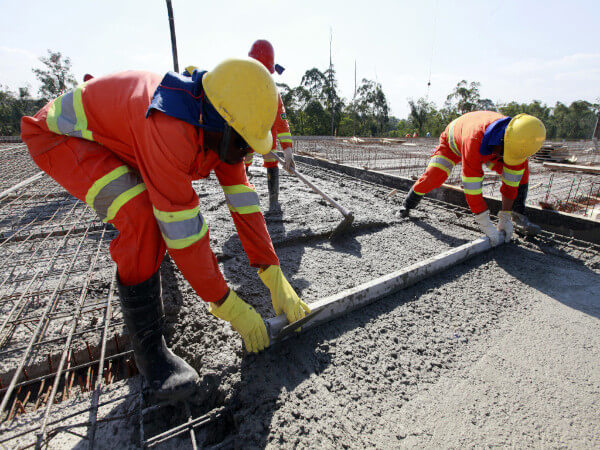
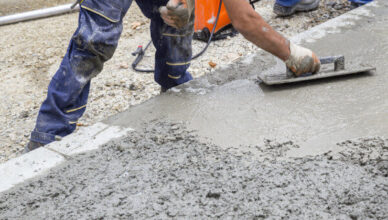
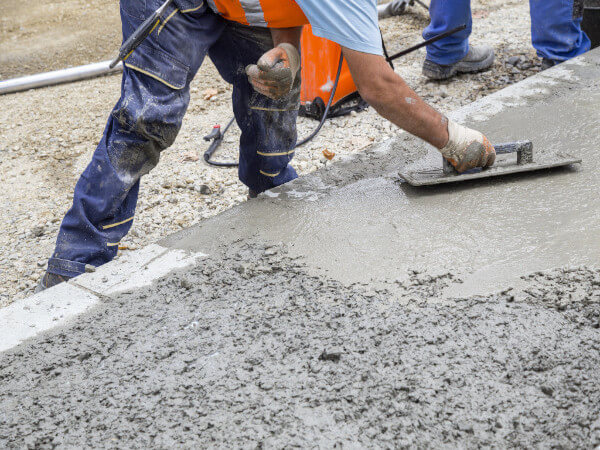
A good concrete surface has a smooth finish and an acceptable level of strength to accommodate dynamic loads. This can be achieved with a wood or sponge float for a smooth finish or with a burlap-drag for a rough surface.

If you have a large area of concrete that has sustained significant damage, it may be necessary to remove the damaged section and pour a new slab. This can be very expensive, but it may be the best option if the damaged concrete is severely deteriorated and is not conducive to repair.
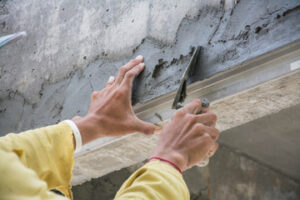
Application

If concrete damage isn’t addressed promptly, it can worsen over time and result in structural damage or even collapse. A thorough evaluation is needed to determine the cause of the damage, classify it as major or minor and select an appropriate repair method.

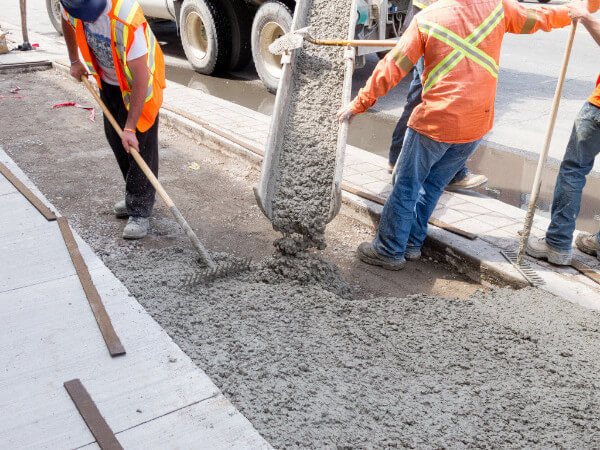
Once the repair method is selected, it is important to select a product that meets the specific needs of the damaged concrete surface. This includes material handling properties, rheology and cure times. Concrete repair products are available in a range of pumpability, slump, flow and hang / stickiness to meet the installation procedures used in each repair project such as: form and pour repairs, pre-placed aggregate concrete repairs, tremie concrete repairs, dry pack repairs, trowel applied vertical and overhead concrete repairs and low velocity wet sprayed shotcrete repairs.

In addition to these critical characteristics, the concrete repair materials must have adequate tensile and compressive strengths to handle the load and environmental stresses that will be exerted on the repaired structure. The material should also be freeze-thaw resistant and have good thermal resistance to reduce differential shrinkage.

Concrete repair projects can be complex and challenging. However, by following proper preparation and application techniques, it is possible to ensure a high quality concrete repair. This will help minimize future damage and save both time and money in the long run.

It is also recommended to use a concrete sealant to protect the repaired surface from moisture absorption, harsh weather conditions and dirt. Regular cleaning and sealing will prolong the life of the concrete.

How to Repair Cracks in Your Driveway

Concrete is durable, but it can take a beating over time. Tree limbs can fall and crack the surface; roots growing near the driveway can force bricks upward; and a lack of proper drainage can cause areas to sink or lift.

Hiring a professional contractor like Paving Companies Charleston SC ensures the job is done properly and to your satisfaction. Practice preventive maintenance, compare quotes, consider cost-effective materials, and request references to lower repair costs.

Cracks in driveways and other concrete surfaces range from surface-level crazing to deep apertures that extend through the entire slab. They may look unsightly but are usually harmless if they’re no wider than the width of a credit card and do not show signs of structural movement or shifting of the ground underneath. Nonetheless, it’s important to address them quickly because they can cause water to seep into the concrete, which weakens it and causes further damage over time.

Fine surface lines up to 1/8 inch in width, often described as crazing or spider web-like, result from shrinkage and minor settlement. These cracks do not indicate any underlying problems and can be repaired with an elastomeric crack filler applied with a caulking gun.

Wider fissures require more extensive repairs and signs that your concrete or asphalt needs replacing or patching. They’re more expensive to repair and will likely need to be widened using an angle grinder or diamond wheel before you can fill them with an epoxy crack sealant.

Before you apply crack filler to your driveway, it’s a good idea to choose a sunny day with no rain in the forecast for at least 24 hours so that any dirt or weeds that have grown into the cracks can be washed away and the filler can set correctly. It’s also a good idea to clean out the cracks, which should be done with a screwdriver or 5-in-1 tool to ensure that any debris is removed and that you’re applying the crack filler to an even, smooth surface.

If the cracks in your driveway are wider than the width of a credit card or extend to the depth of the concrete, they’re considered structural cracks and should be repaired or replaced as soon as possible. The natural movement of the earth causes structural cracks. They can be exacerbated by seasonal changes, heat expansion, freezing and thawing cycles, or poor installation that allows the ground to shift beneath your driveway. A qualified professional should examine these cracks to determine if your driveway is at risk of further damage and what repair options are best for your situation.

A hole in a driveway is a real car hazard and a major eyesore. If left untreated, it can get bigger and cause damage to vehicles driving over it. You can easily fill holes using a cold asphalt patch (called blacktop repair).

Before starting the actual hole, using a pressure washer to remove loose debris and dirt is a good idea. This will allow you to get a better view of the hole and how big it is.

You should also heat the asphalt surface surrounding the hole with a flame torch. This will help bond the patch aggregate with the existing asphalt and make your repairs last longer. Just be careful not to overheat the surface, or you may damage the oils in the asphalt and cause more problems down the road.

After cleaning the hole, you should add crushed gravel as a base for your patch material. This will prevent water from seeping into the subgrade and causing more problems. Then, you can start putting in your patch material.

Your large pothole will probably sag a bit as vehicles drive over it. This is why you need to fill it a little higher in the center than you would for a smaller hole.

You can also use a plate compactor to compress your patch material and make it look nicer. For best results, try to do your patching work in the early morning or evening when it is cooler.

When repairing holes, we tested a few products, including a cold asphalt patch, a Sakrete cold patch, and a professional-grade blacktop repair. We found that the Aquaphalt worked best overall because it was easy to use and provided the most resistance to shear, deformation from a vehicle’s turning tires, and penetration from a probe. It also comes in various aggregate sizes, giving you greater flexibility for your driveway needs. It is a little more expensive than the others we tested, but it might be worth it depending on how long you expect to keep your driveway before you have to re-pave.

Concrete and asphalt driveways have a lifespan of 30 years or more, but over time, they can begin to sink or sag. When this happens, it’s important to address the issue quickly. A sunken driveway is unsightly and can cause tripping hazards and damage your car tires or the garage floor. Fortunately, there are a few ways to repair concave sections of your driveway.

In some cases, you can replace the surface of your concrete driveway with a new layer of paving stones or concrete. This can be a difficult and expensive project, but it can offer the best chance for the problem not returning. However, it’s important to consult with a professional before proceeding. A soil engineer can help you diagnose the root of the problem and recommend the best solution for your specific situation.

Another option is to use a concrete lifting technique like mudjacking to raise the sunken section. This method is much faster and less disruptive than replacing the concrete surface. It can be used on sidewalks, patios, pool decks, and other areas of concrete that have sunk. However, there are better choices than this method for a whole driveway. If you have a large hollow section of your driveway, digging up the old concrete and pouring a new slab may be necessary.

Erosion and ground subsidence are some of the main causes of a sunken driveway. This can be caused by some factors, including poor rainwater drainage that leads to erosion and undermining soil underneath your driveway. Also, a leaking or broken underground pipe or line can wash away the soil under your driveway, causing it to sink.

Temperature fluctuations also contribute to the settling of concrete. As the ground freezes and thaws, the pressure beneath your concrete changes, which can cause damaging frost heaves. Contact the experts if you notice a portion of your driveway sinking or pulling away from your home. They can inject a limestone slurry under your concrete to lift it back into place.

When the edges of your asphalt driveway start to crumble, it is important to repair them as soon as possible. This will help to prevent further damage and improve the overall look of your driveway. The repair process will involve removing loose debris, filling cracks, compacting and leveling the repaired area, and sealing the surface. You can achieve a professional-looking result for years with proper preparation, a few tools, and the right materials.

Crumbling edges are often caused by excessive traffic near the edges of the pavement, which can cause the asphalt to become thin in those areas. This can also result from poor grading, drainage issues, and temperature changes. In some cases, these areas can even develop large block cracks. These types of cracks are often caused by stress on the pavement and can be more difficult to repair than edge cracks.

To fix the problem, you will need to start by removing any loose asphalt pieces from around the damaged areas. You will want to do this carefully to avoid damaging the surrounding area. You can use a chisel and 3-lb. sledgehammer to break up and remove loose asphalt. Be sure to discard the flexible asphalt properly, as it can contain hazardous materials.

Once the loose asphalt has been removed, you must fill in any cracks with cold asphalt. This should be done as soon as you notice them developing, as asphalt cracks tend to spread rapidly. Once the cracks are filled in, you must smooth out rough edges with a hand sander or an orbital sander fitted with coarse-grit sandpaper. Be sure to sand until the area is flush with the rest of the pavement surface.

Once you have made all the necessary repairs to your driveway, it is important to protect it from further damage by applying a sealant. Be sure to select a sealant designed specifically for asphalt surfaces and follow the manufacturer’s instructions for application. By following these steps, you can ensure that your repaired asphalt driveway will last for years and continue to look great!

What Is Concrete?

Concrete is the most common construction material in the world. Concrete Contractors Cincinnati use it in buildings, roads, sidewalks, and everything we see around us.

Concrete is made of cement and fine and coarse aggregates with or without admixtures and water. The cement reacts with water and forms a paste that binds the aggregates together.

concrete contractors

Concrete is a construction material with immense strength and can withstand heavy loads and stresses. It is also fireproof, which makes it a great choice for building projects that require strict fire codes. It can also withstand the impact of falling debris, making it an ideal construction material for earthquake-prone areas. Concrete is very durable, and with proper care, it can last a lifetime.

It is made up of a mixture of aggregates (rocks, shells or gravel) with cement and water. The cement paste coats the surfaces of the coarse and fine aggregate, gluing them together into a solid mass. The cement-water mixture is then reinforced with steel bars or mesh, which adds tensile and compressive strengths to the structure.

During the mixing process, air is entrained in the concrete, which reduces damage during freeze-thaw cycles and increases durability. However, the entrainment of air decreases the strength of concrete, so it is important to use defoamers to minimize the amount of trapped air in the mix.

The strength of concrete is determined by its composition, the type of binder used, and how it is mixed and placed. The mixture is poured into forms and vibrated or manually worked to ensure that it settles evenly into the forms and around the reinforcement. It is then cured in the form of cubes or cylinders for 28 days to reach its full strength.

To create different types of concrete, the cement content is varied along with the type and size of aggregate. The mix is graded based on its compressive strength, with the first letter denoting the required strength (for example M30) and the second indicating the type of aggregate used (for example, granite or limestone). The final result is a rock-solid structure that is impervious to corrosion and has an exceptional resistance to cracking.

Concrete is one of the most widely used materials in the world. It is used for a variety of applications, including residential buildings, roads and bridges. It is particularly suited for massive projects, such as dams and tunnels, because it has superior strength in compression. However, it is weak in tension and requires extensive reinforcing to resist bending forces.

Concrete is an excellent building material for structures that require durability, as it withstands natural disasters like earthquakes and hurricanes. It also resists other manmade events such as fires. The heaviness of the material makes it very strong and resistant to shocks. Concrete is also very affordable and can be quickly mixed to create a concrete mix ready for use on the construction site.

Durability is defined as the ability of concrete to resist weathering action and chemical attack while retaining its desired engineering properties. The ability of concrete to retain these properties is dependent on several factors including mix design, proper placement and curing practices as well as environmental conditions. Unfortunately, improper construction practice and improper mix designs often cause premature deterioration of concrete structures leading to a loss in service life.

A major factor affecting the durability of concrete is its permeability, which is affected by a wide range of transport processes and reactions within the concrete. These processes and reactions take place both in the bulk of the concrete and the interfacial transition zone (ITZ), which is created by the interface between aggregates and the concrete paste. The permeability of concrete is further affected by the surface characteristics of the aggregates and the water content and chemical composition of the cement.

Concrete’s durability is also influenced by its freeze-thaw properties. When concrete is exposed to repeated cycles of freezing and thawing, spalling may occur. This can be avoided by using a low water-cement ratio, non-reactive aggregates and pozzolanic materials. The addition of air entraining admixtures and reduction in the maximum size of coarse aggregate also improves concrete’s freeze-thaw durability.

Durability of concrete is also influenced by its resistance to chlorides and other aggressive chemicals. This can be achieved by the use of corrosion resistant reinforcements and by the inclusion of admixtures such as fly ash, slag cement and silica fume. Finally, the durability of concrete is influenced by its crack healing capabilities, which are based on the formation of a soft gel that fills and seals the cracks. These properties are important for applications such as marine foundations and tunneling through dense sand deposits.

Concrete is a versatile and flexible construction material that can be used to build a wide range of structures. This is because it can be mixed on-site and shaped into many different forms. This flexibility allows for quick and reliable construction that can be modified to meet the requirements of a particular project. It also saves time and money by reducing transportation costs.

A variety of materials are used to make up concrete, including sand, coarse aggregates and cement. The aggregates are dispersed throughout the mixture and act as a filler, while the cement acts as a binder that binds everything together. There are many types of concrete, and each type is designed for a specific application. For example, dams require concrete that has high strength and durability to resist the forces of nature such as earthquakes and floods.

Traditional concrete is typically made on-site using a mix that includes portland cement, coarse and fine aggregates and water. It can be molded on-site into different shapes and sizes, or it can be precast in factories to create building components such as beams and slabs. It is usually available in dry form or as ready-mix, which can be delivered to a job site by truck.

There are also lightweight concrete options that are available for use in various applications. This type of concrete has a density less than 1920 kg/m3, and it is made with lightweight aggregates such as pumice, perlites or scoria. It is often used to construct buildings and long-span bridge decks.

Another type of concrete is ultra-high performance concrete, or UHPC. This type of concrete is more flexible than traditional concrete, and it can be poured in very thin sections. This flexibility makes it ideal for use in modern architecture that requires thinner components or unique shapes.

This type of concrete is also more energy-efficient than other construction materials. It does not absorb heat as easily, which means that it can keep a room or home at a comfortable temperature year-round. It also doesn’t off-gas any organic compounds that could affect the air quality in a home or office.

Concrete’s durability and recyclability make it a sustainable building material. It leaves a small environmental footprint and can be used in green buildings that reduce operating energy consumption. It also reduces waste by utilizing recycled materials, which minimizes landfill space and helps to support local economies. Its resistance to harsh environments can create resilient infrastructure that will last longer and reduce the need for costly repairs and replacements. Its low permeability protects against the intrusion of harmful chemicals and pollutants.

The concrete industry has a number of sustainability initiatives underway. It’s possible to make concrete more sustainable by lowering its embodied carbon, which is the sum of all carbon emissions associated with the production and use of a building. This can be done through increased sourcing of local materials, optimizing mix designs, and using byproducts from other industries instead of virgin raw materials. It can also be reduced by implementing lean manufacturing and just-in-time production that decreases waste and transportation-related emissions.

Reinforced concrete is cast to precise specifications, which minimizes waste, and any excess can be crushed and reused for aggregate in new concrete. This process reduces energy consumption, as well as the need to mine and transport virgin raw materials. Concrete also has excellent fire-resistance properties, which can save on insurance costs and keep occupants safe in the event of a disaster.

For the foreseeable future, concrete is likely to be an indispensable part of the world’s built environment, but it must be made more sustainable. The nexus of politicians, bureaucrats and construction companies that is dependent on the profits and jobs generated by concrete-fest infrastructure projects is difficult to break. These groups need more projects to maintain their power and influence. Party leaders get donations and kickbacks from building firms, state planners want more infrastructure jobs to drive economic growth, and construction bosses need contracts to stay in business.

The solution is to change the incentives. Governments need to focus on policies that promote economic growth with a focus on value for money and quality of life. This will not be easy, but the alternative is a country that is reliant on ever more expensive and environmentally-destructive infrastructure to achieve its GDP goals.

Finding A Reputable Foundation Contractor

The foundation of a home is one of its most vital structural components. So, homeowners need to find a reliable foundation contractor who can make sure the repairs are done correctly and efficiently.

Finding a qualified foundation repair professional doesn’t have to be an intimidating task for homeowners. All you have to do is ask Sugar Land Foundation Repair the right questions!

foundation repair

Experience

Whether you’re building a new home or making repairs on an existing one, finding a reliable foundation contractor is essential. The right contractor will be experienced and have a track record of quality work. In addition to this, they should be licensed and insured. This will protect you from financial liabilities in case an accident happens during the project. You can also get recommendations from friends or family members who have used the services of a good foundation contractor. You can even look at their social media profiles to see their previous work.

A good foundation repair contractor will be able to explain to you the different methods they use to repair your home’s foundation. This will help you determine which method is best for your specific situation. Additionally, they should be able to give you detailed quotes that include the costs of materials, labor, and permits. This will prevent you from getting overcharged or being charged more than necessary. You should also make sure that your contractor is certified. This organization makes sure that building products meet code compliance.

Once you’ve determined that a particular foundation repair contractor meets your needs, it’s important to evaluate their experience. Many foundation companies will mention their years of experience on their website, but you can do a little more research to find out what other people have to say about them. Read reviews on their site and look for those written by building inspectors. These are both great ways to learn about a contractor’s reputation and whether they are worth hiring.

It’s also important to consider how long your contractor has been in business. The longer a company has been in business, the more likely it is to be reputable and reliable. Also, a company with an established history is more likely to offer warranties on its work. These warranties can be a great sign of confidence, and a lack of them should be a red flag for you. Having a warranty on your foundation repair can ensure that the results of the job last and that any issues are taken care of promptly.

License

The foundation repair industry isn’t regulated like other building trades, so you won’t find many contractors with formal education or licenses. But that doesn’t mean you can’t look for other qualifications that signal reliability and trustworthiness.

One of the most important is an insurance policy that protects you from financial liability in case something goes wrong during a project. A reputable company will always carry general liability insurance to cover any accident that may occur on your property. You should also check whether the contractor has a valid business license. This will ensure that they are legally operating in your state or region and that you can file a complaint in case of any problems with their work.

Another thing to look for is a certification that shows that their methods are compliant with local building codes and regulations. This certification is an excellent indicator of the quality of their work. You should also ask them about their experience in the field and whether they have a history of satisfied clients.

In addition to verifying a foundation contractor’s license and insurance coverage, it is also a good idea to check their reputation. This will tell you if they have had any complaints or if they follow ethical business practices. You should also read reviews and look at the company’s website to see how they present themselves.

A reputable foundation repair contractor will use their knowledge and expertise to inspect your structure and the surrounding soil. They will then recommend the best solution based on your specific needs. They will also use their knowledge to source the right materials and install them correctly. Lastly, they will inspect the work to make sure it meets all the necessary safety standards.

A qualified foundation contractor will also be able to provide you with a detailed estimate and outline the process for fixing your structural issues. They will also answer any questions you have about the work and cost. In addition, they will provide you with a warranty to give you peace of mind that their work is backed by a trusted name in the industry.

Insurance

Your home’s foundation is the most important structural element of your house. You must make sure you hire a contractor who is insured to work on it. You would not want to employ an eighteen-year-old kid running an emergency tooth clinic out of his garage littered with PBR cans – he might only charge you 25 cents, but your jawbone will end up in the ER later that day. The same goes for hiring an unlicensed, unscrupulous foundation repair guy. He may be cheap upfront, but the damage to your foundation is going to cost you a lot more than his services.

It is important to find a contractor who has general liability insurance as well. This type of insurance covers any damages caused by the contractor during the project. Homeowners should ask each potential contractor to provide proof of this insurance before they sign a contract. An honest, capable foundation company will not be hesitant to provide this documentation. Homeowners should also find out whether the company has a worker’s compensation policy in case a workman is injured during the process.

Most homeowners’ insurance policies will cover some or all of the cost to repair foundation damage if it is caused by a covered peril. This includes burst pipes that cause water to leak into the foundation, or natural settling and shifting of the foundation that occurs over time. However, most insurers will not cover damage that is caused by earthquakes unless you buy a separate earthquake insurance policy.

In most cases, you will need to have a foundation specialist come out to your home and conduct a full inspection of the problem. They will be able to determine what is causing the damage and tell you how extensive it is. They will then be able to help you file a claim with your homeowner’s insurance, if necessary. They will also be able to give you an estimate of how much the repairs will cost, so you can budget for them. They may even offer a warranty on their work, which indicates that they are both reliable and committed to quality.

Reputation

Reputation is an important part of choosing a foundation contractor. You would not hire a plumber or electrician without checking their reputation, and you should do the same for a foundation repair company. Checking references, insurance coverage, and warranties will help you find a reputable foundation contractor that is worth your money.

You can also check a foundation repair contractor’s reputation by looking at reviews online. This will give you an idea of what other people think about their work and whether or not they would recommend them to friends and family. You can also ask family members and friends for recommendations, as they may have worked with foundation repair companies in the past.

It is also a good idea to get a free inspection and estimate from a foundation repair contractor before hiring them. This will allow you to see what their services are, how much they will cost, and how long the project will take. It will also give you a chance to meet the contractors and decide if they are a good fit for your project.

When a foundation repair company is reputable, they will offer quality customer support and warranties. A warranty is more than just a piece of paper, and it shows that the foundation repair company cares about their customers’ homes. It will also protect you if something goes wrong after the repair. Some companies offer a 25-year warranty, which is a great way to ensure that you are getting a quality foundation repair.

A good foundation repair contractor will be able to answer your questions and explain the process of fixing your home’s foundation. They should also be able to tell you why your house needs foundation repair and what the cause is. You should also ask about the timing of the project and if any factors could affect it, such as if you plan to sell your house soon or if any major holidays are coming up.

Your home is probably your biggest investment, so it’s important to choose a foundation repair company that you can trust. Choosing the right foundation repair company is just as important as selecting the right doctor or surgeon. Follow these tips to find, vet, and hire a reliable foundation repair company.

Super Travel Tips That Maximize Your Travel Time

Regardless of the length of the trip you are taking, nailing the tiniest of details matters in determining your travel experience good or bad. The ideas in this article can give you the sort of trip you truly want.

The less items you have, the less the chances of having the items stolen or lost.

Make sure that you have clothespins with you when travelling. While you may not usually think of packing clothespins, clothespins can perform many functions.

You surely do not want to deal with the noise of construction while on vacation.

These sheets can be a flat surface for kids to color on or play cards.

Check the expiration dates on your passports. Different countries have different rules regarding passports.Some countries won’t allow you into their country if your passport is about to expire.

Research currency rates before you travel so you can easily budget your departure since this will make it easier to budget.You must know your dollar’s value so you are able to spend and even save money. This will help you to save some money on fun while minimizing unnecessary spending.

Sign up for email newsletters from the major airlines. The savings makes it worth handing out your inbox.

Take lots of breaks when driving with small children. Breaks give you the opportunity to stretch your limbs and use the bathroom. Getting little kids out of cars here and there can help to prevent motion sickness. Your trip may take longer, but having less stress is worth the delay.

Jet lag is an all too common complaint for you and your family. You can’t avoid it completely, but extra sleep on the days before you travel can minimize the effects. You should also try sleeping during the flight if possible.

Plan service stops when going on a road trip.You will find that service areas are few and far between, isolated stretches of highway. Plan your route around repair places that can handle maintenance on your car if need be. Keep their phone numbers close at hand as you just in case.

Road trips can get very boring which is a great reason to plan activities along the trip. Breaking things up on your trip can create memories that will last a lifetime. Provide your children with a copy of stops you plan to make.

As pointed out at the beginning of this article, whether you’re traveling a short distance or to a far away destination, there are some planning steps you can take that can help you to relax and enjoy your time away. The advice here will make it a great experience.

You can also visit our other website and post your article.

Rusa Medical Centre, Always Stampin, How To Build A Virtual Assistant Business, Puget Sound Silent Flyers, Bellanova Travel, San Luis Coastal Measured, Electrician-Fortlauderdale, Smerise Collective, Set Pump Fast, VOR Business Training, New Americans Alliance, Vivid Painting LLC, Long Horns Shop, Kitchen & Dining, Product Launchr, Poshe Shop And Ship, Mcarpenter Md, Green Home Builders Of The Triangle, Eartheries, Rebecca Elbaum, Chuckheiney, Scotts Valley Town Green, Germ Tackle, NWP Collection, Freedom Sings Colorado, Organic Gardens Today, Peak Oil NYC, Mexico Infrastructure Projects, Divine Appetite Cafe, Chuva Group, Internet Marketing Here, Sagewood Kitchens, Wyoming Switchboard, Embroidery By Ace, Charleston Your Home, Yard Cardz, Liberty Mutual Research, ISCEBS-Iowa, NJ Dare Officers, Dream Sleep Now

post

How to Mix Concrete by Hand or in a Mixer

Lots of people fear using concrete. If it goes wrong, it can be difficult to fix, but for smaller domestic jobs it’s actually a lot easier than many people think. With this guide, we’ll go over the different ways to mix concrete so you can decide what’s best for you when attempting your DIY project.

Concrete Proportions

Concrete has 3 main ingredients. Cement, aggregate, and sand. These ingredients are mixed with water, which when dried out, binds into a solid, very hard material. Depending on what you’re using the concrete for, these can be mixed in different proportions to give you different finishes and strengths.

It’s very important to get these proportions correct. With too much sand, your concrete won’t be hard enough to withstand the test of time. However, too much aggregate and you’ll be rushing to find a way to cover it up and pretend that it isn’t there.

Mixing Methods

In a domestic setting, there are several different approaches you can take to mix your concrete. If you’re happy giving the different proportions a go, you can either do this by hand or by using a mixer. For small scale jobs, mixing by hand can be ideal as it’s easy to keep track of the consistency and see how it’s going. This can often be a good thing to do as a practice if this is your first time. For larger jobs, a concrete mixer can save you hours of time and strength mixing larger amounts of concrete together.

When it comes to domestic concrete, it’s often overlooked that there are some other options also available to you, especially for slightly larger jobs such as concrete bases for sheds, summerhouses and other garden accessories. The main differences between domestic and commercial worksites are space. Often with a commercial worksite, the work will be planned to make these processes as efficient as possible, allowing the concrete mixers to reverse right up to where they’re going. However, this doesn’t mean you can’t utilise similar methods.

Types of Concrete Mixers

There are two main different types of concrete mixer. There are ordinary concrete mixers and also volumetric concrete mixers and both of these have different uses. You’ll likely have seen ordinary concrete mixers or mini mixers driving around quite frequently. These have the advantage of being able to transport one of many different mixes of concrete. Extra ingredients can be added to the concrete at the factory in order to provide different properties such as waterproofing or extra fibres for additional strength. However, this isn’t often needed when it comes to domestic concrete.

The other type of concrete mixer is a volumetric concrete mixer. These are ideal for domestic concrete as you don’t need to worry about having too little or too much. ‘Mix as you go’ concrete mixers contain the raw ingredients needed and as you pour out the concrete will mix it straight away. They also have the added advantage over traditional concrete mixers of being able to supply multiple different mixes of concrete to the same job without having to pay the additional cost of bringing in a second load.

Concrete mixers and volumetric concrete mixers are also a great choice for people taking on DIY projects that don’t want to take the risk of getting the mix wrong. All you’ve got to worry about is where it goes with the extra guarantee of knowing that it will stand the test of time. Thank you for reading this blog post. Should you have any enquiries, feel free to call us on 07812 182778 or visit our contact page for more information.

The post How to Mix Concrete by Hand or in a Mixer first appeared on Base Concrete.

post

Top Tips To Sealing A Concrete Floor

How To Seal A Concrete Floor?

Using concrete flooring in your home can be an excellent choice. Especially if you’re interested in the durability of your floor. However, to make a concrete floor last it’s important to seal it properly since concrete is porous.

Sealing a concrete floor is an effective way to keep your floor free of stains from substances such as grease, oil, water, and others. As if that’s not enough, sealed floors look beautiful and are easier to clean.

To ensure that the sealer is effective, however, the application process has to be done properly. Everything you do, from surface preparation to picking the right application tool, will go a long way towards determining the final outcome. 

How To Go About Sealing A Concrete Floor 

Here’s a quick summary of what you should do when sealing a concrete floor

Clean the floor (remove stains, dust, oil, etc. from the concrete)  Remove any old sealer from the floor Use an etching solution to open up the concrete Use a sprayer or roller to apply the first thin coat of sealer  After the first layer has dried, apply a second coat of sealer in the opposite direction Leave the sealer on the concrete until it dries fully (avoid driving or walking on the concrete until it’s dry) 

Cleaning the floor

To avoid inconvenience, you should remove the furniture and everything else from the room. Keep in mind that you will need somewhere to store the items for no less than one week. Once the room is clear, sweep it thoroughly, and then proceed to clean any area that is still dirty. 

You can use mineral spirits to clean grease spills. Once the floor looks clean, use a concrete cleaner to ready the floor for sealing. Rinse the cleaner off, and then wait for the floor to dry. At this point, you can use a concrete repair caulk to fill any visible cracks. Then finally, wait until the caulking has dried completely.

Removing the old sealer

If the floor had an old sealant, you have to wait before applying the new sealant. If you’re not sure whether a sealant was used on your floor or not, you can use water to test this. To do this pour approximately one cup of water on the concrete.

If the water does not soak into the floor but instead beads up and remains on the surface, the floor had been sealed. If the floor had not been sealed, the water would soak into the floor. To remove the sealant, you can use a chemical stripper.

Since chemical strippers are acid-based, be sure to protect yourself when removing the sealant. After removing the sealant, you’ll have to let the floor dry for at least 24 hours before proceeding.

Choosing the sealer

There are four main types of sealers to choose from:

•   Acrylic sealers 

This kind of sealer sits on top of the floor and is mainly used to seal interior floors. Acrylic sealers are easy to apply, but they don’t protect the floor effectively against grease and oil stains when compared to other sealers.

•   Epoxy sealers 

Despite being more durable compared to acrylic sealers, this type of sealer also sits on top of the concrete. Epoxy sealers protect your floor effectively against grease stains, but they are difficult to apply. They are also available in various colors enabling you to change the look of your floor.

•   Polyurethane sealers 

This type is mainly meant for use over other types of sealers. Polyurethane sealers have UV protection, which keeps them from turning yellow over time. They also sit on top of the concrete, but the layer is usually thinner.

For this reason, polyurethane sealers are mainly applied over epoxy as the top layer. The sealers are available in semi-gloss, matte, and glossy finishes. Such sealers are typically fine when used over other sealers, but if you’re not sure, you can always get some clarification from the shop you are buying from.

•   Silane/siloxane sealers 

You can use this type of sealer if you don’t want to change the look of your floor. Since the sealers penetrate the concrete, it won’t become glossy or darker. It will retain the matte grey color. This kind of sealer lasts 20 years or more and is effective in protecting the floor against stains and deterioration.

pplying the sealant

Here’s what you should do when applying the sealant:

1. Carefully read and understand the instructions

Every sealant is a tad different from the other. For that reason, you should read the manufacturer’s instructions to attain quality results for your project. Be sure to pay attention to important details such as the most appropriate temperature and humidity recommendations for application.

2. Ventilate the room

In whatever room you’re working from, ensure that there is enough ventilation by opening the windows and doors where applicable. You can also use an outside-facing fan to facilitate the movement of air from the room to the outside area.

3. If using an epoxy sealant, mix the two parts together

Epoxy sealants come in two different containers whose content should be mixed before application. In such a case, you should pour the content of the smaller container into the bigger one and then use a stir stick to mix them thoroughly.

You should mix them only if you’re ready to start the application process. It’s also important to note that you’ll have a period of one hour or so to get the epoxy down. For that reason, you have to be quick when working.

4. Divide the room into smaller sections 

It’s recommended that you divide the room into four sections for ease of application. You should start with the least accessible section, and work your way out to the door so that you won’t have to walk on the wet sealant.

5. Use a small paintbrush when sealing the edges of the floor

Get a paintbrush that is 5.1 to 7.6 cm wides and use it to apply the sealer along the edges of the concrete floor where the paint pad or rolling brush may not reach. Be sure to use nice, even strokes when applying the sealer.

6. Apply the sealer using a rolling brush or paint pad 

Pour some sealant into a painting tray and then dip a roller brush or a paint pad into the paint. If using a roller brush, be sure to roll the brush evenly in the paint. Use the roller brush or paint pad to apply a thin coat of the sealer along the edge that you’ve already painted.

Continue applying the sealer across the floor until you’ve covered the entire floor. When applying the sealer, you should ensure that there is always a wet edge to carry on from. The reason for doing so is to achieve a uniform look on the floor. 

Since you’ve already divided the room into smaller sections, you can work on each one of them at its own time. As you apply the sealer, make sure that you spread it evenly across the floor. You should also keep track of your area of coverage to avoid ending up with some patches that haven’t been sealed.

7. Apply a second coat 

For a smooth and even finish, you should apply a second thin coat. To ensure better coverage of the sealant across the floor, you should apply the second coat at right angles to the first one. Let the sealer dry as per the time recommended by the manufacturer on the sealant can, before walking or driving on the concrete. You should be ready to wait for up to four days to allow the sealant to dry completely.

Final thought, 

Sealing your concrete floors is a foolproof way to increase their lifespan while also enhancing their beauty. The good thing is that you can easily complete a floor sealing project by yourself. If, however, you’re not particularly confident with your DIY skills, you should hire an expert.

If any of our high-quality services interest you, give us a call on 01442 389105 or 07812 182778 today. Or fill out the enquiry form on our contact page for more information.

The post Top Tips To Sealing A Concrete Floor first appeared on Base Concrete.

post

How To Lay A Concrete Base

Follow these steps for the best DIY project

If you are going to be laying a concrete floor for a DIY project it is important that careful preparation is made and each recommended step is followed. You may want to consider hiring a professional to do the work for you. Or at least certain parts. Perhaps the messier steps! Let’s take a look at how to lay a concrete base with this handy guide:

Mark Out Required Area

The first step is to mark out the required area for your concrete base, this can be done using pegs and string. And will need to be 100% accurate. So, make sure all sides are straight.

Dig Out The Area

Next, it is time to dig out the area you have just measured. Dig the ground in the marked area to around 175mm deep for a smaller shed or 225mm for a larger one. As you are going to need a level base it is a good idea to keep the depth you are digging as consistent as you can. Afterwards, remove the pegs.

dd Crushed Stone To Dust

For this step, you will need an MOT type 1 stone, this is crushed stone from 40mm to dust or gravel. Shovel into the space a minimum thickness layer of 75mm to form a hard base for the concrete layer. The depth should be about 100mm for a shed and around 150mm for something larger like a summerhouse. 

Measure, Cut And Fit 100m Timber Rails

Now it’s time to measure and cut and fit 100mm timber rails to the base and make sure the framework is level. This step is to create a framework that offers a strong and stable edge to the concrete and to ensure it is level.

Spread Out Layer 

Spread out that layer of MOT stone or gravel. Then use either a manual earth rammer or powered wacker plate to compact it. This will help create a firm base for the concrete and stop it from cracking over time.

Mix The Concrete 

So, now it is time to mix the concrete. Spread it out evenly and level it off. After smoothing over, grab a stiff broom to lightly brush across the base helping to encourage a textured non-slip surface. 

Keep an eye on the weather forecast at all times. At this stage, if wet weather is forecast cover the base with polythene or a tarpaulin for 24 hours. If it’s hot weather instead then use sacking and keep it damp for a day otherwise the concrete could too dry quickly. This will result in shrinkage and even cracking. You then need to leave it for at least three days to cure.

Finishing Touches 

For finishing touches, look to see if your base is flush with the ground. If this is the case, you will have a space running around the edge of the concrete where the rails were. You can fill this with pea gravel, it will help drain away moisture from the concrete base. Now you just need to place on your base whatever your intended item was!

We hope that our blog has helped you understand how to lay a concrete base. If you have any questions please don’t hesitate to give us a call on 01442 389105 or alternatively head over to our contact page to fill in our online enquiry form. 

The post How To Lay A Concrete Base first appeared on Base Concrete.

post

How to Avoid Concrete Failure

While concrete is extremely strong, it can also be very brittle if it’s not properly mixed and cured. Concrete failure can occur in a variety of ways because of the versatility of this material and all of its applications.

Each type of failure is different and has its own causes and solutions. It’s important to understand how these common types of failures occur so that your project is not negatively affected.

Keep reading to learn 5 tips for preventing concrete failure.

1. Avoid trapped air 

Trapped air bubbles in concrete can cause it to fail. Concrete is a mixture of gravel, sand, and cement (among other ingredients), and when this mix gets poured into forms or molds, trapped air bubbles can form. 

These bubbles result in weak spots that aren’t able to handle pressure.

To avoid trapped air when mixing concrete, ideally, you should hire a professional with a mixer truck rather than attempting to mix and pour on your own. 

When mixing on your own, you risk adding too much water to the mix or mixing it for too long. This can cause small cracks and fissures which will leave your concrete vulnerable as well. 

2. Don’t overload concrete forms

Overloading concrete is another common cause of concrete failure. While concrete is one of the strongest materials on the planet, different types have different limits. For example, reinforced concrete should be used if you anticipate supporting a large weight or structure.

Unfortunately, some cheap contractors like to cut corners here by using the wrong type of concrete to complete the job faster. Then, once heavy loads are placed on the concrete, it cracks.

3. Always use good quality raw materials

Using good quality raw materials is another way to avoid concrete failure. This goes for both the sand and gravel used in your mix as well as the cement itself.

If you’re not using a reputable supplier, there’s no telling what sorts of additives they may be including in their products (or if any at all). 

For example, recycled or fly ash cement can sometimes be used in place of traditional Portland cement. While this is cheaper, it also has a shorter lifespan and may not meet the standards you’re looking for.

The same goes for sand or gravel that doesn’t measure up to your specifications. If it’s too coarse, the concrete mix won’t have enough cohesion between particles which can cause the material to crumble.

If you want strong, durable, and long-lasting concrete, always make sure to use a reputable contractor and supplier for raw materials.

4. Use water treated with low levels of dissolved sulphate

Using water with low levels of dissolved sulphate is another way to avoid concrete failure. You see, metal ions (especially iron or steel) can lead to the formation of rust within your concrete mix which will make it vulnerable and prone to cracking.

The easiest thing you can do here is use deionized water in place of tap water. If this isn’t available, try to use water with low levels of dissolved sulphate. This will prevent the metal ions from being deposited into your concrete mix which will result in a stronger material overall.

5. Don’t use high-silica aggregates in areas with high humidity

If you’re using high-silica aggregates in areas with high humidity, you may run into concrete failure. This is because the aggregates will absorb moisture from the air, leading to cracks within your material over time.

For example, if you’re creating a sidewalk or patio in a high-humidity area like Louisiana, and you use this sort of aggregate without a waterproof coating, you may be in for a rude awakening.

6. Hire the professionals

Concrete failure is expensive. The best way to avoid it is by hiring the professionals at Port Aggregates.

At PAI, our professional concrete contractors are skilled in creating bubble-free, high-quality pours in high-humidity areas like Louisiana.  We use only the best quality materials for our mixes and never cut corners to save money or time. 

Contact us today to request a quote for your next residential or commercial project!

The post How to Avoid Concrete Failure appeared first on Port Aggregates.

Did you miss our previous article…
https://www.bellanovatravel.net/?p=101

post

5 Reasons to Choose a Rip Rap Retaining Wall

A retaining wall is necessary for any landscape project. 

Without them, shorelines will quickly erode or flood, and gardens become overgrown with weeds.

The most popular type of retaining wall is the traditional concrete block style that has been around since the 1950s.

However, plenty of other options are available. One such option is a type of limestone called rip rap.

This bulky stone offers an array of benefits. When used as a retaining wall, it’s:

1. Aesthetically pleasing

A rip rap retaining wall is an attractive way to add some interest and excitement to your yard or city shoreline. The irregular shapes of the stones give it a more natural, rustic look that complements a variety of styles.

2. Eco-friendly

Because limestone can be obtained from quarries, it has less environmental impact than other materials like concrete and steel. It is also a sedimentary rock, which means that it’s formed over time from the weathering of other rocks.

The process of obtaining limestone does not involve chemical treatments or strong acids like some materials do. It helps to protect the environment and human health during and after its creation.

In addition, limestone is a natural sponge that absorbs water. This makes it an especially good choice for areas like the South that experience heavy rainfall and hurricanes.

3. Great for protection against the elements and erosion

Thanks to its irregular shape, rip rap can be useful in more urban areas to protect buildings from heavy rains and flooding. It also prevents soil at construction sites from getting washed away by rainfall or runoff water that carries mud and silt into nearby waterways.

4. Long-lasting

Rip rap is a long-lasting material that can remain in your landscape for many years. Since it’s made from limestone, you can also rely on this material for its strength and durability. Unlike certain materials like cinder blocks, rip rap will not break down over time.

In addition, the limestone itself has been around since prehistoric times and will likely be here until another type of rock comes along to replace it. This provides an excellent return on investment compared with materials like wood or plastic which need replacing every few decades.

5. Easy to maintain

One of the final benefits of rip rap is that it’s easy to maintain. Unlike traditional concrete block walls, you don’t need to replace these stones since they’re not attached together with mortar or cement.

Instead, each stone rests on top of the other and can be removed when necessary (if repairs are needed or if you want to create a new design).

In addition, the irregular shapes and sizes of rip rap makes it easy to find just what you need for your project, whether that’s one large piece or several smaller ones. This is unlike many other types of retaining wall stone which are sold in pre-cut pieces.

Port Aggregates offers three types of rip rap: 10lb rip rap (6-10”), 30lb rip rap, and 55lb rip rap. Whether your goal is to prevent erosion or simply create a garden, we’ve got just what you need. Our high-quality crushed limestone is available in numerous sizes to suit your special needs. Contact us today to request a quote

The post 5 Reasons to Choose a Rip Rap Retaining Wall appeared first on Port Aggregates.